

こちらの記事でダウンロードできるデータ
1|デザインのベースとなる文字列を作成する
まずはデザイン全体のベースとなるテキストラインを作成します。
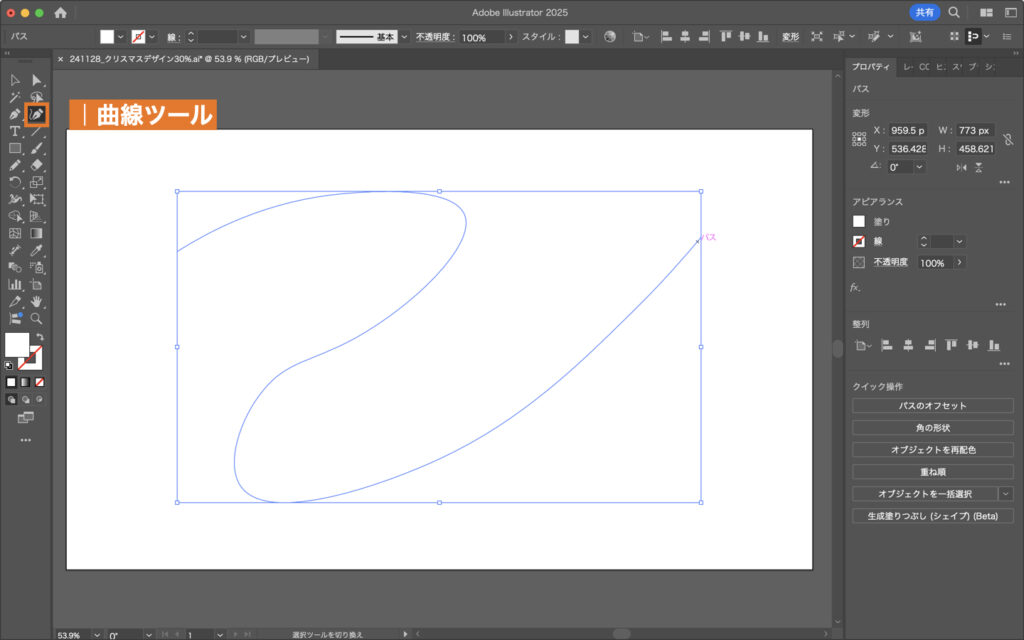
STEP1|テキストラインのベースとなるパスを作る
「曲線ツール」を使って文字を並べるためのパスを作っていきます。
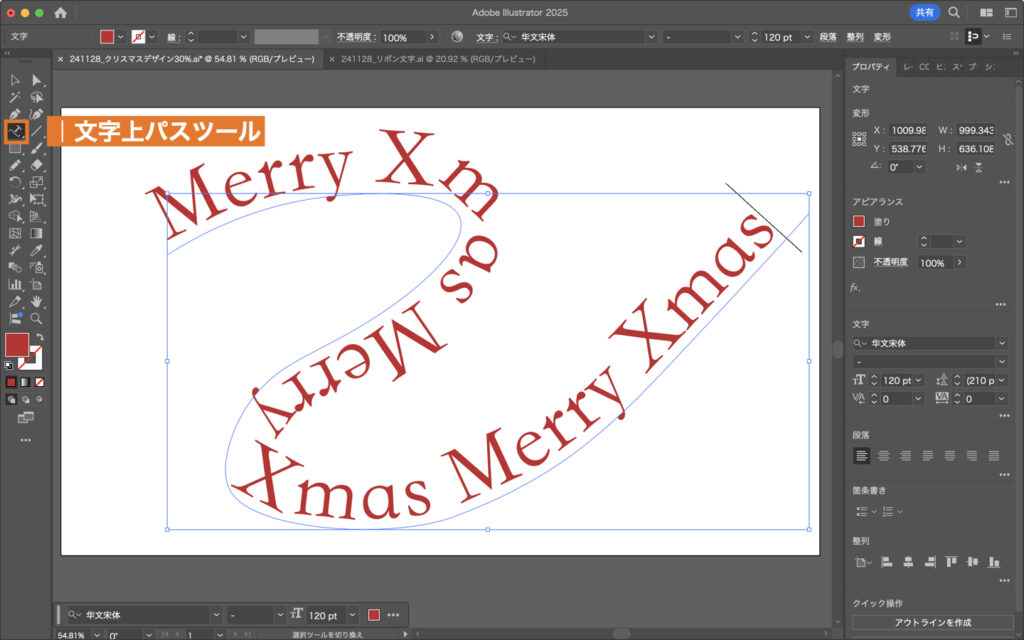
STEP2|パス上に文字を配置する
「パス上文字ツール」を使ってパスの上に文字を並べていきます。
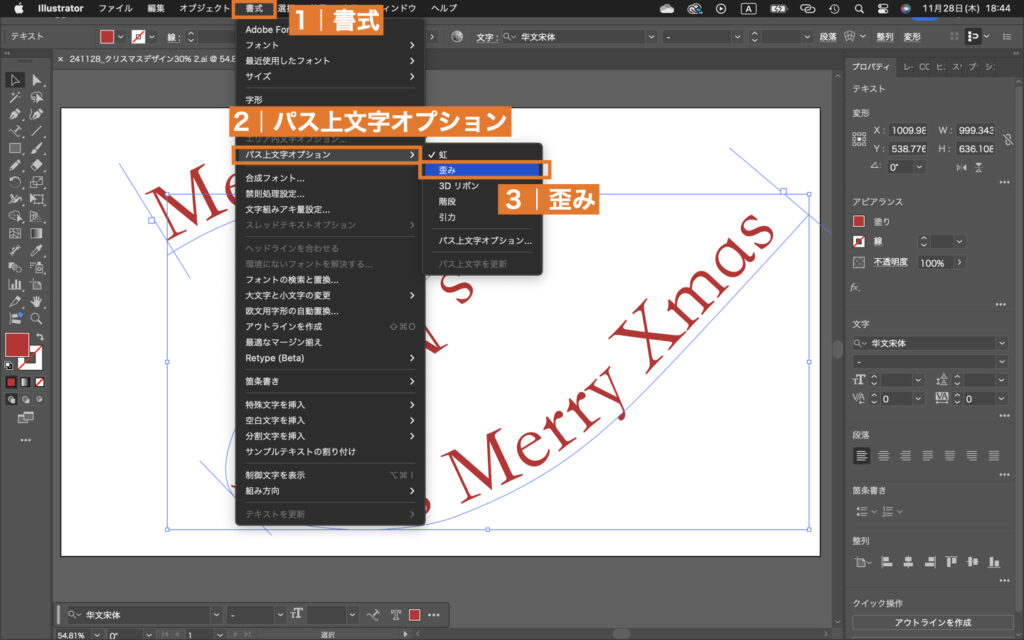
STEP3|文字を立ち上げる
「パス上文字オプション」を使って文字を立ち上げます。
オブジェクトを選択した状態で「書式」→「パス上文字オプション」→「歪み」と選択。
2|立ち上げた文字列にぼかしをつける
Illustratorで作成した文字列にぼかしをつけて影のような演出を施します。
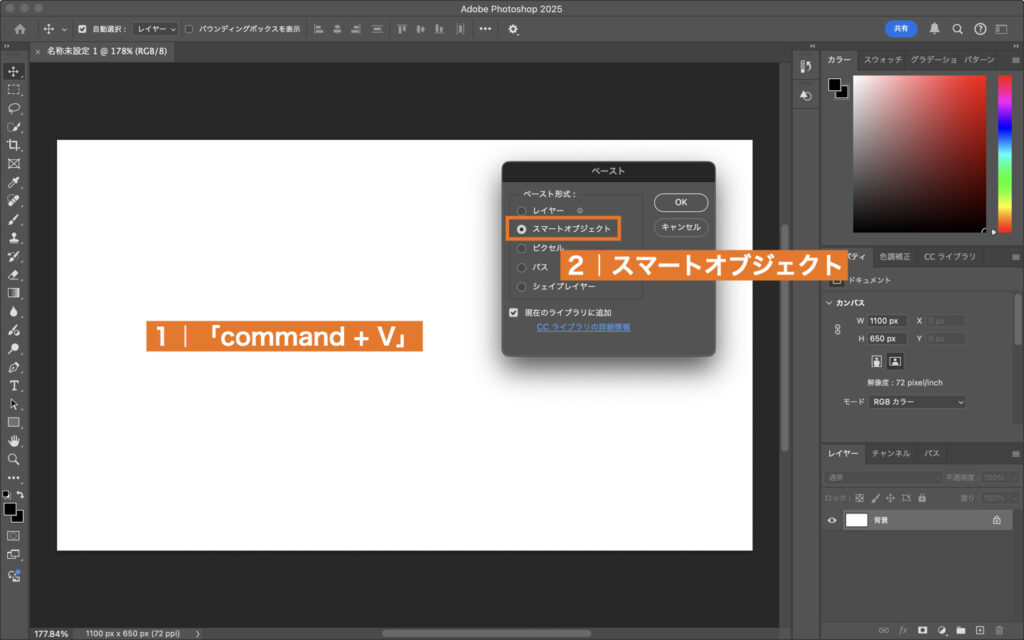
STEP4|Photoshop上に表示する
Illustrator上でオブジェクトを「command + C」でコピーし、Photoshopに「command + V」でペーストします。
ペースト形式を選択するウィンドウが表示されるので、スマートオブジェクトを選択しましょう。
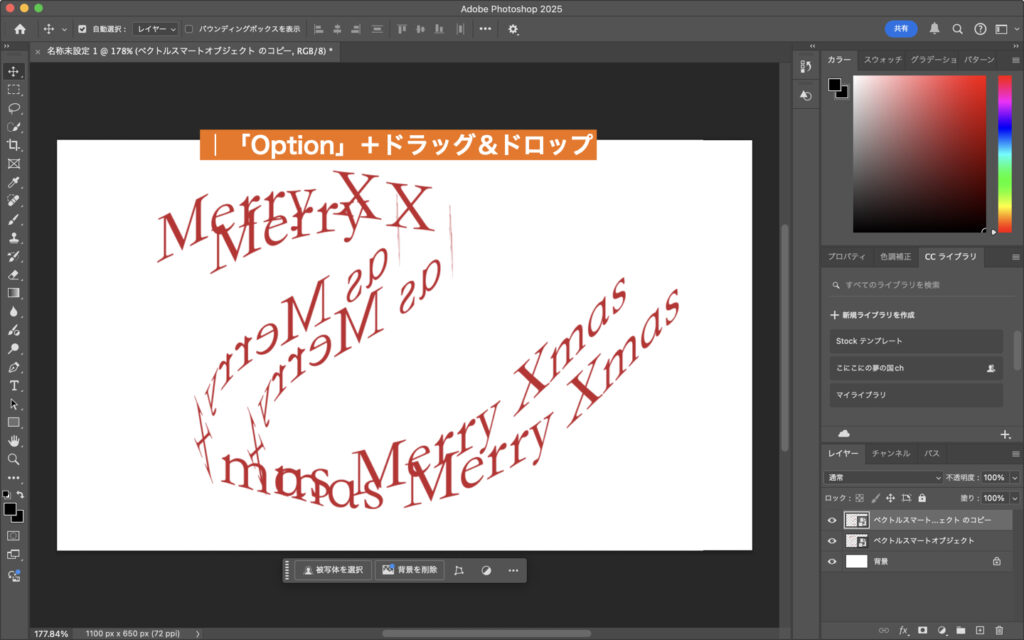
STEP5|ペーストしたスマートオブジェクトを複製する
「Option」キーを押しながらドラッグ&ドロップでオブジェクトを複製します。
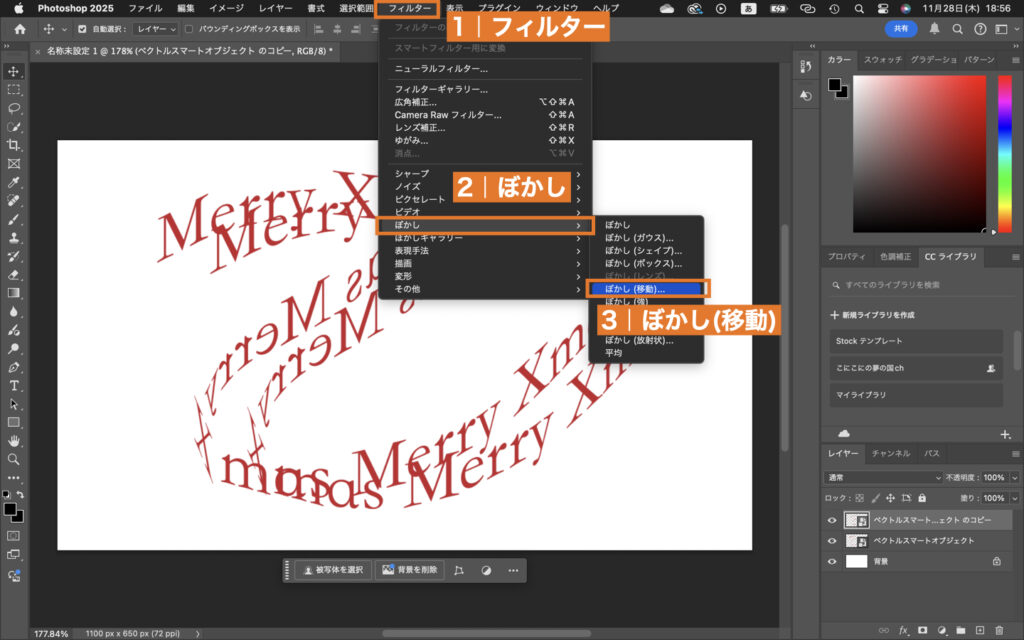
STEP6|複製したオブジェクトをぼかす
複製したオブジェクトを選択した状態で
「フィルター」→「ぼかし」→「ぼかし(移動)」と選択します。
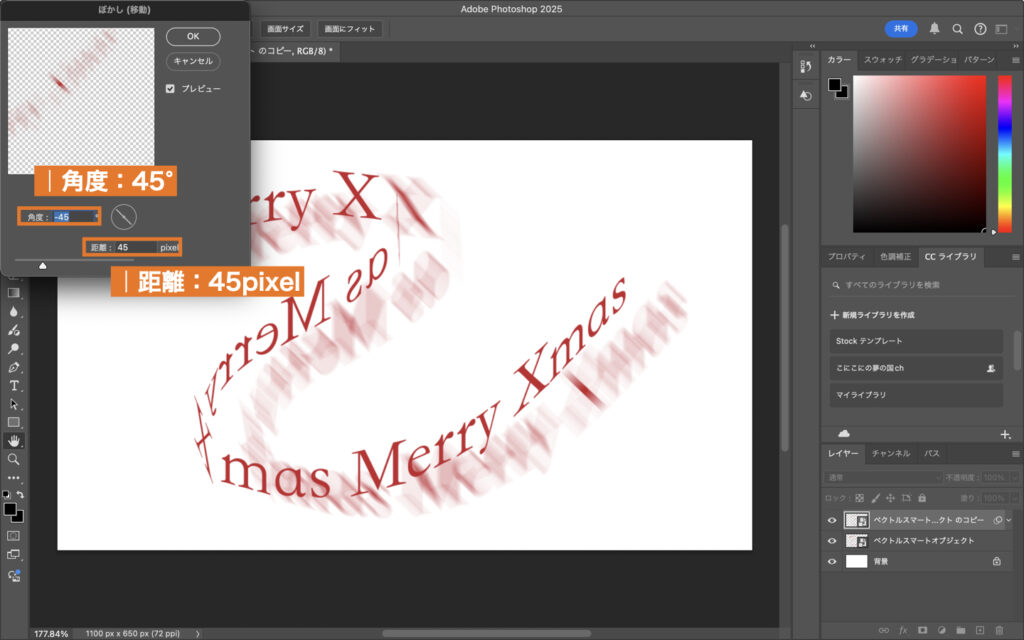
STEP7|ぼかしの角度と距離を調整する
今回は角度を「-45°」、距離を45pixelにします。
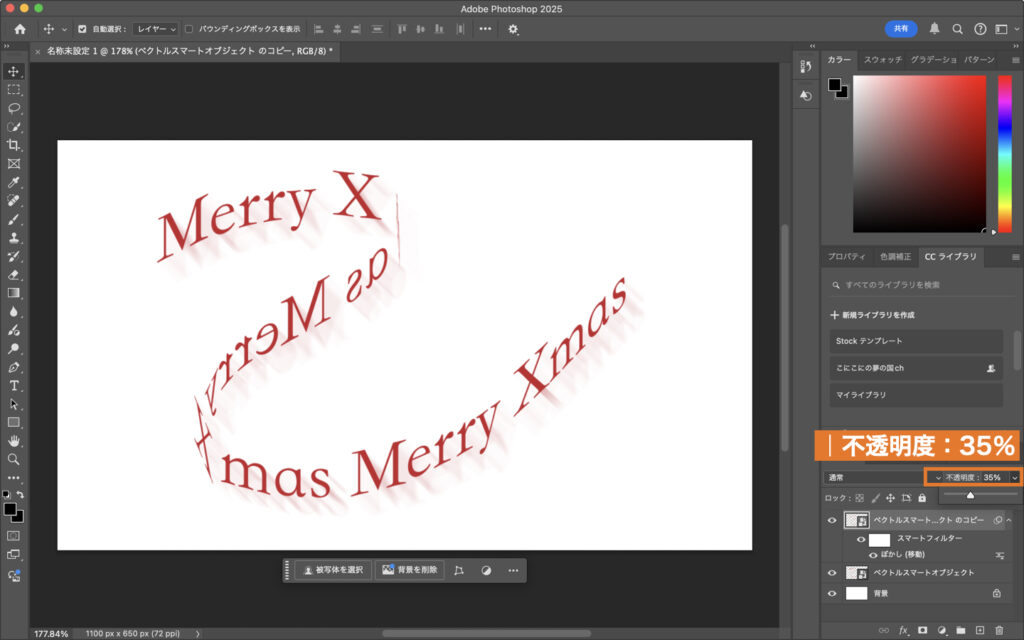
STEP8|ぼかしたオブジェクトを重ね合わせて不透明度を調整する
レイヤーパネルから不透明度を調整します。今回は「35%」にしました。
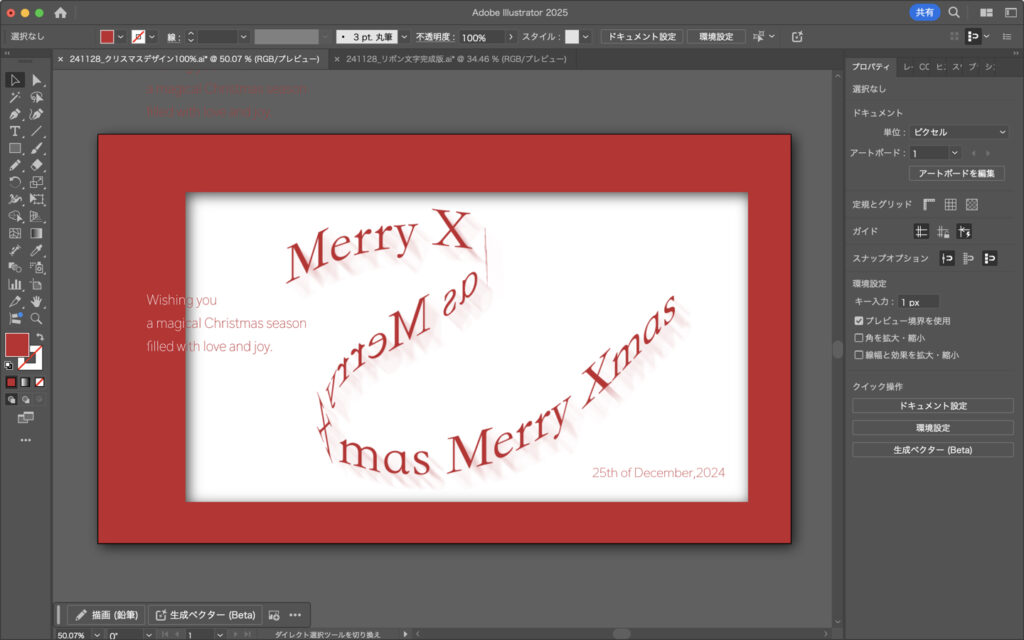
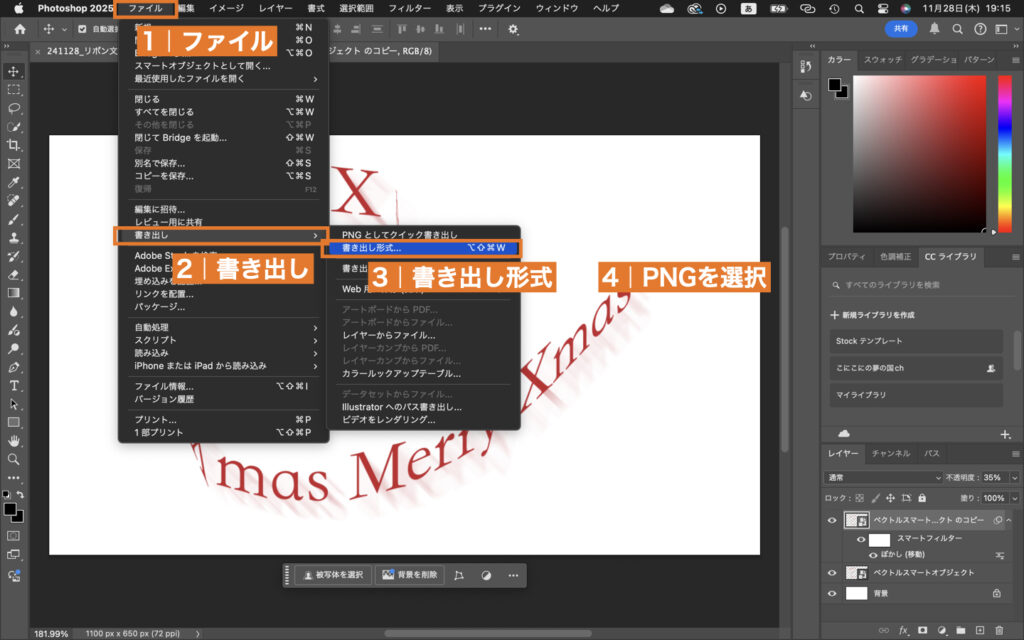
完成したらデータを書き出します。
「ファイル」→「書き出し」→「書き出し形式」→「PNG」で書き出します。
STEP9|Photoshopで書き出したイメージをIllustratorで仕上げる
書き出したPNGデータを再度イラレに取り込んで仕上げの装飾をしたら完成です。